WikiCombat
Combat
Where to fight
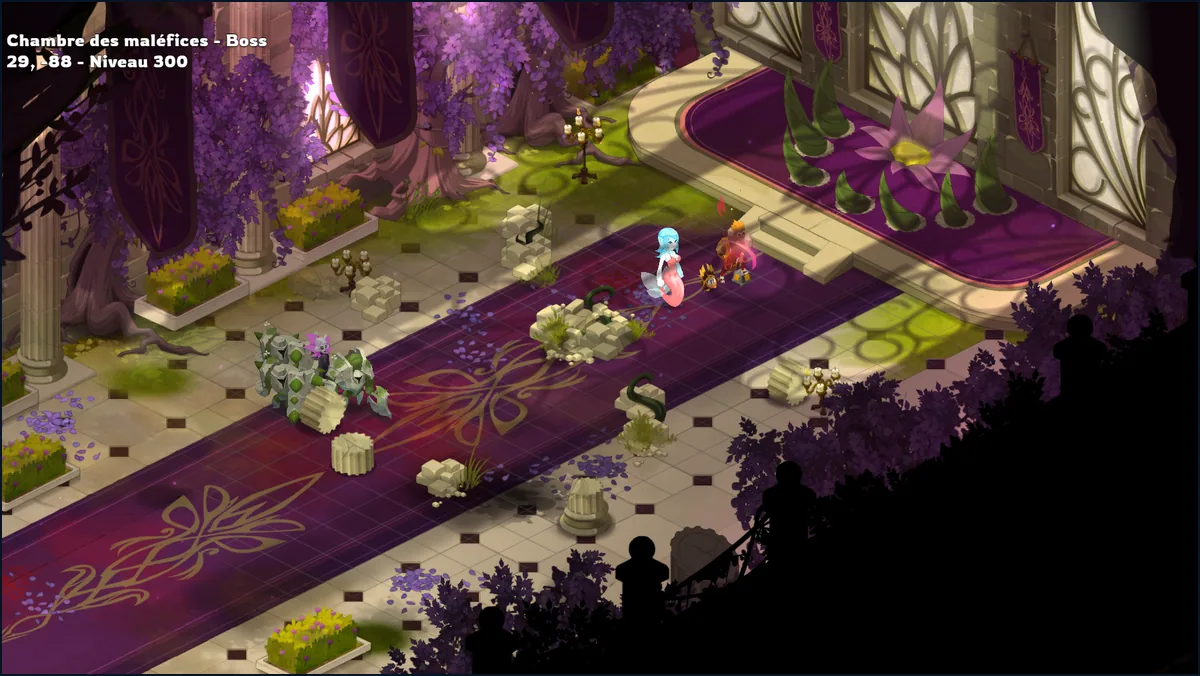
125 dungeons, six eight-room Pegasus dungeons, Dreams that never end and bosses up to level 300: pick where to fight.
On this page
- The path in five steps
- The open world
- Hard 1 to 3
- Nimaltopia and Osavora
- Osavora
- Dungeons
- Pegasus dungeons
- Family dungeons
- The Abyss
- What if you lose a fight?
- Challenges
- Dreams
- Dopples and wanted notices
- The Dopples
- This week's end game
- The Spiral of Eons
- The Rusher Event
- The Horsemen and the Anomalies
- The Kolossium
- Arenas and souls
- Watching a fight
- Passives in combat
- What the icons show
- Reading the exact sentence
- Combat settings
- What next?
The path in five steps
Talk to the guardian in front of a dungeon door. He tells you the level, the boss, the key required and your record.
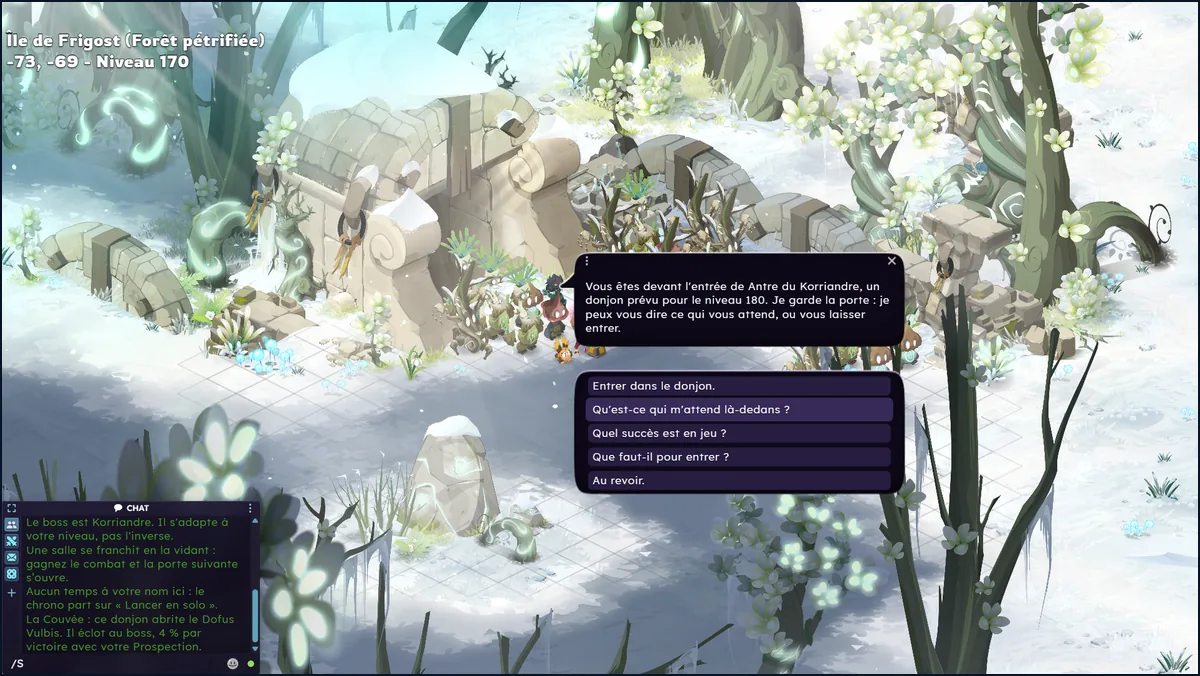
In front of every dungeon, a guardian tells you the level, what awaits you and what you need to get in. Enter with your daily key. Your Keyring gives 3 free entries per day, all dungeons combined. After that, the guardian opens his shop: the dungeon's key is paid in Mana, from 64 to 860 Mana depending on the level.
Win every room and take your La Donne card. A Pegasus dungeon has eight rooms.
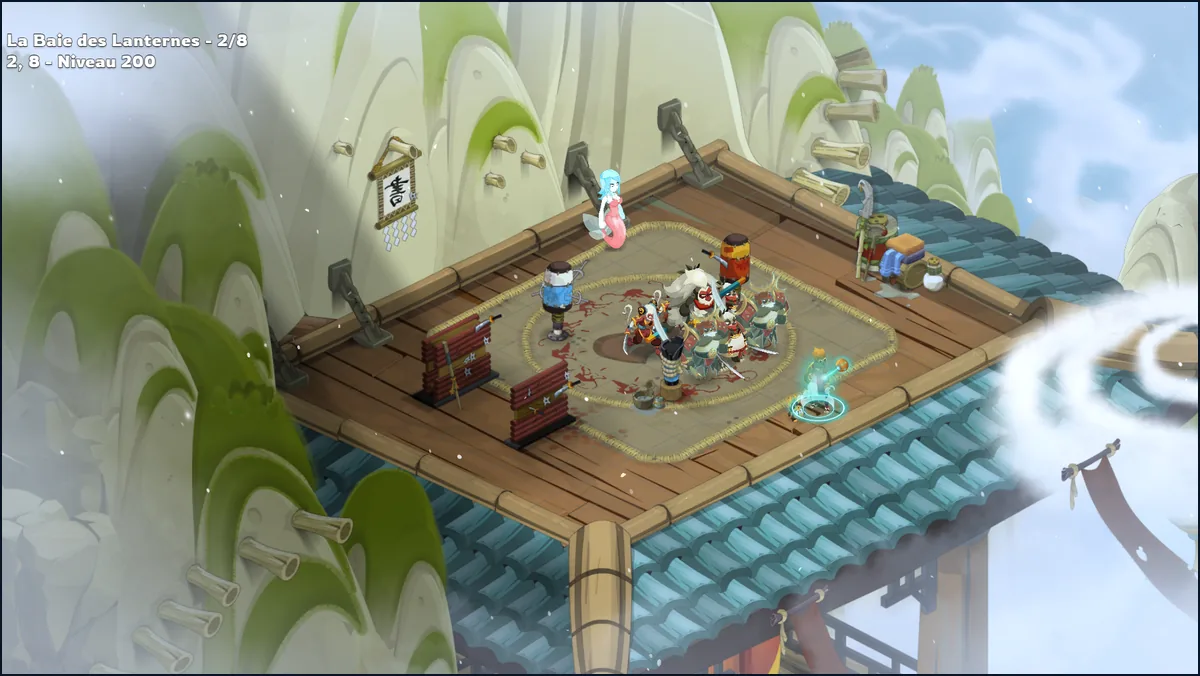
The Bay of Lanterns, room 2 of 8: a Pegasus dungeon has eight rooms of eight monsters. Beat the boss and pick up your tokens. Many bosses have a rule, written in the chat at the start of the fight.
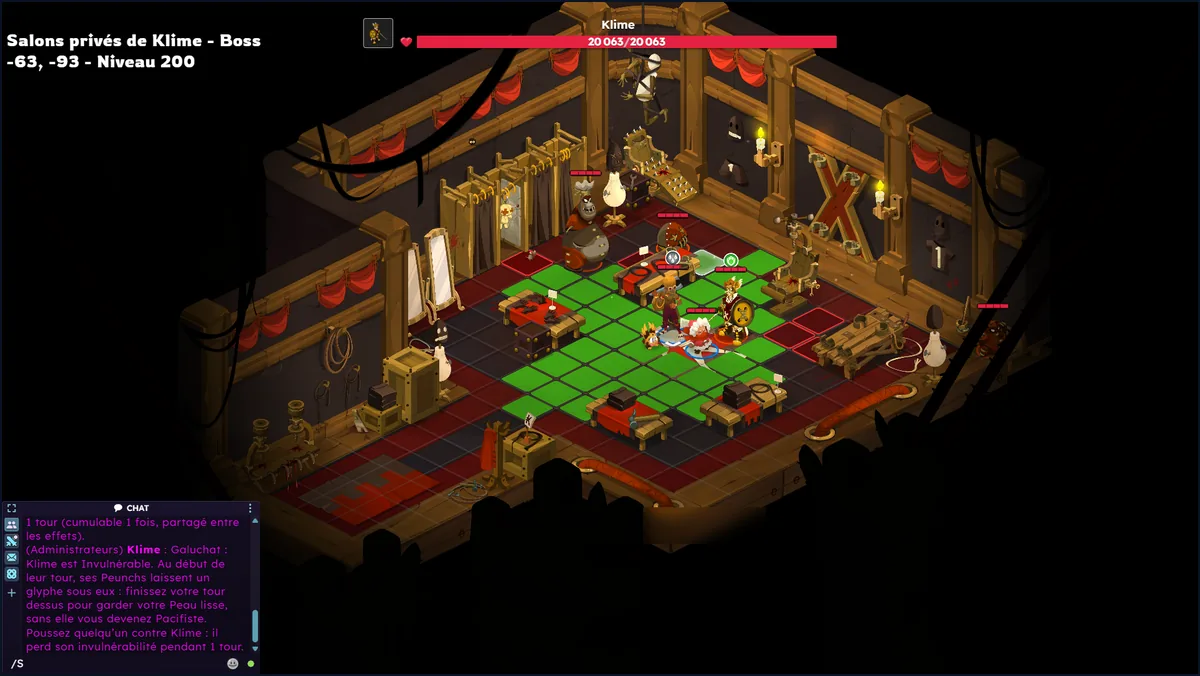
A dungeon boss, Klime: his mechanics are described in the fight chat. Come back when you can move up a level. Dungeons go up to level 300.
The open world
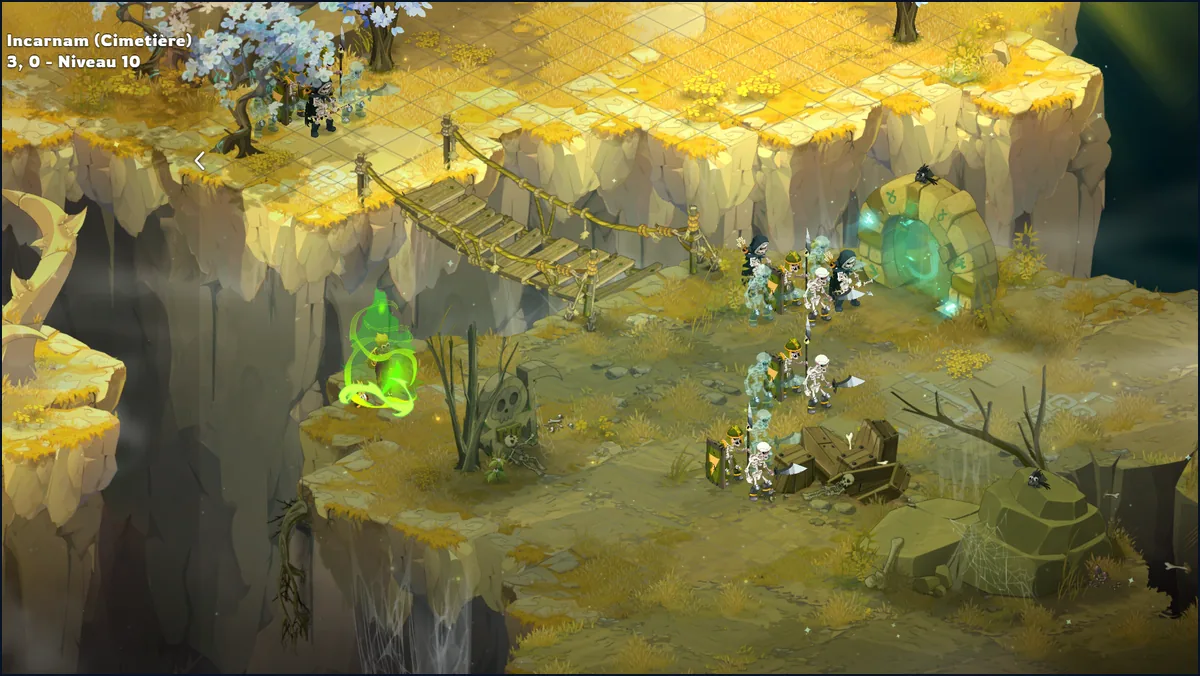
Monster groups are visible on the map and do not move. Take a zaap (.zaap), hover over a group to read the fight's XP, then click it to start the fight. You earn XP, Mana, loot and monster card packs. Hold Z to show all the tooltips at once.
Hard 1 to 3
Hard is a difficulty option: tougher monsters, extra XP and loot. You set it with the Hardcore Master, in the Sanctuary, or with .hardcore 1 to .hardcore 3 (.hardcore 0 to turn it off), outside a fight. It applies to all your fights until you change it.
| Level | Monster stats and HP | Monster AP / MP | Your XP and loot |
|---|---|---|---|
| Hard 1 | +50% | +1 / +1 | +25% |
| Hard 2 | +100% | +2 / +2 | +50% |
| Hard 3 | +200% | +4 / +4 | +150% |
The bonus is only paid on a won fight. Monsters' percentage resistances do not change, and your summons and companion are not strengthened.
Nimaltopia and Osavora
Nimaltopia and Osavora are two regions of the original game that you reach by zaap. Neither has its own quest or harvest: you go there for the monsters, their resources and the dungeons.
Nimaltopia is a level 180 zone. Four monster species live there, Buckshot, Draftwit, Nemroz and Crambo, from level 182 to level 190, in aggressive groups: they attack you if you walk past. The Nimaltopia zaap is at [-67,29] and the trip is free. The first time your character enters the zone, the game writes a line in the chat: the name of the zone, its levels and its dungeon.
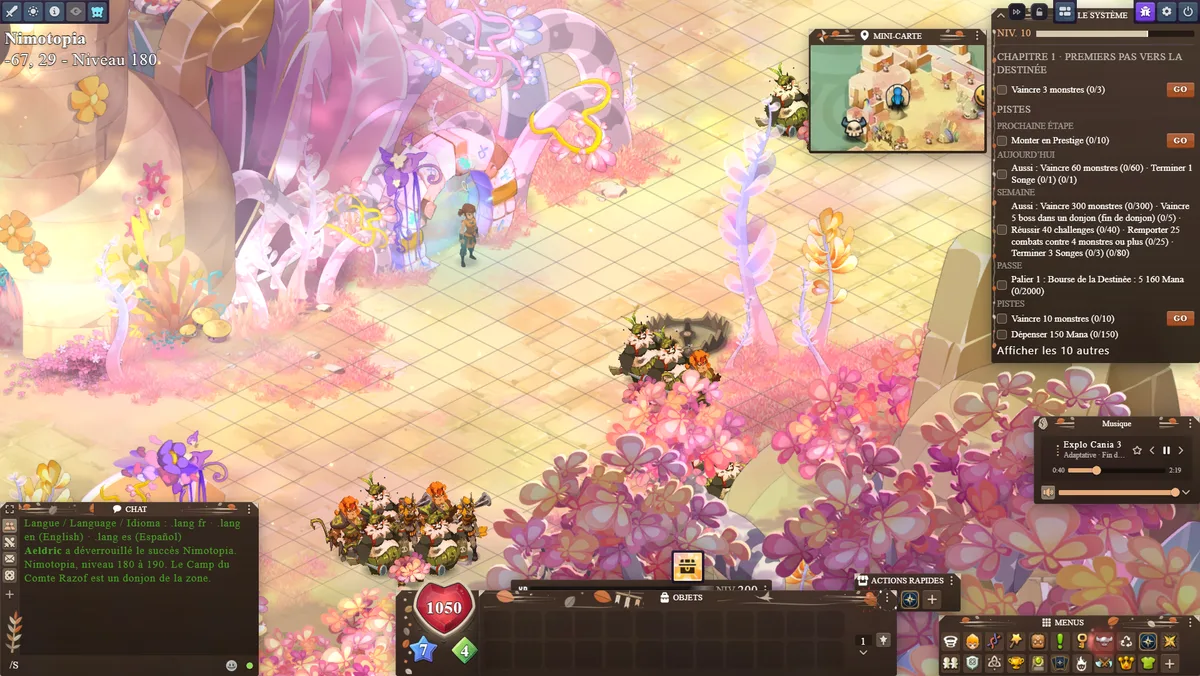
Count Razof's Camp is the zone's dungeon: 3 rooms, recommended level 190. The Count arrives in the last room with three monsters of the zone. Its guardian stands on map [-68,30], next to the zaap. Once your 3 free entries of the day are spent, he sells you the Dungeon Key [161-190], 700 Mana.
Osavora
Osavora is a region of the Osavane zone: 12 monster species, from level 160 to level 212. Take the Osavane zaap, at [9,8], free as well. The on-foot gate of the Rocky Roads does not lead to Osavora yet: go through the zaap. Three maps east of Osavane, at [16,9], [17,8] and [18,7], have no way back on foot.
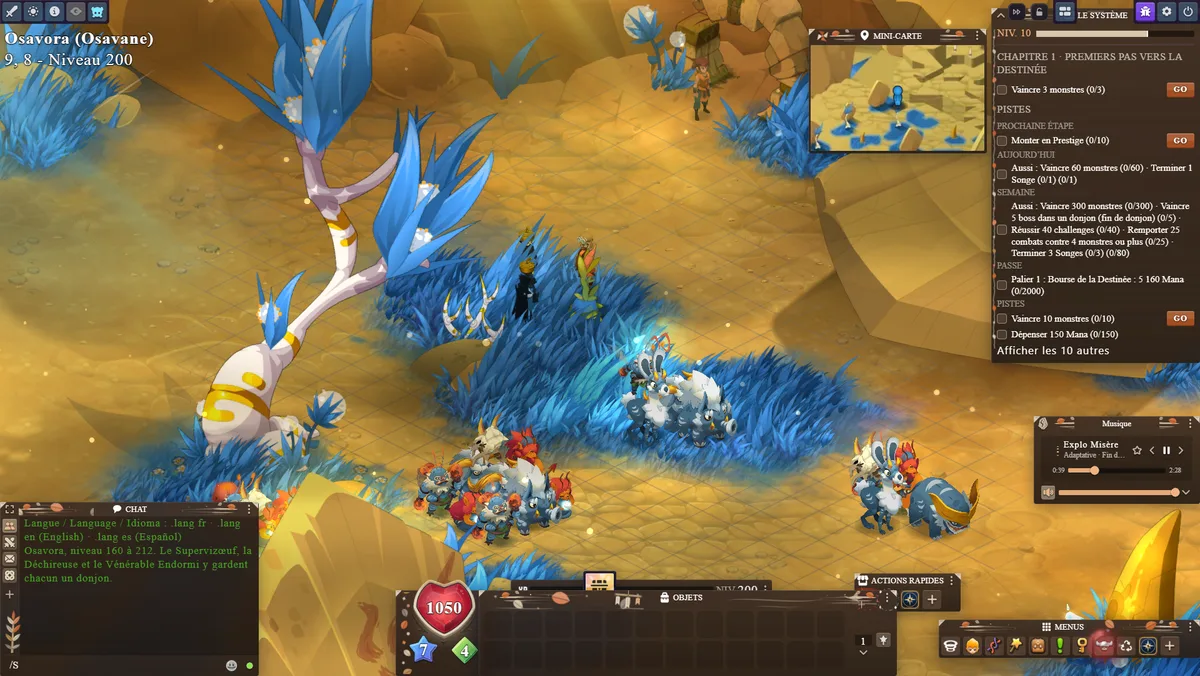
Three guardians stand on the zaap's map, one in front of each dungeon. Your free entries of the day apply to all three, then each asks for a key: 700 Mana for the [161-190], 820 Mana for the [191-200]. None of the three bosses has a rule written by the server: they play with their spells from the original game.
| Dungeon | Recommended level | Rooms | Boss | Key |
|---|---|---|---|---|
| Bzzegg Supervisor's Checkpoint | 170 | 4 | Bzzegg Supervisor (level 170) | [161-190] |
| The Ripper's Altar | 200 | 3 | Ripper (level 220) | [191-200] |
| The Venerable One's Thicket | 200 | 3 | Sleeping Venerable One (level 220) | [191-200] |
Dungeons
A dungeon is a series of rooms with a boss in the last one. There are 125 in the base game, from level 10 to level 300, with 1 to 9 rooms: 122 come from the original game, 3 were added by Pegasus. A guardian stands in front of each door. After each room you win, you pick a La Donne card. The "LEAVE THE DUNGEON" NPC waits for you in each room, except in the middle of a fight: leaving makes you lose the visit in progress.
A boss pays tokens according to its level: 2 at level 1, 8 at level 100, 32 at level 200, 43 at level 300. It can also drop equipment loot, relic fragments, and in 16 dungeons a hidden Dofus (the Brood). Tokens are used at the token shop (see Progression).
Dungeon search, groups and modular dungeonsTable
Entering. Through the guardian, or through the dungeons window: choose a dungeon then Start solo, Resume (you restart from your last room) or Start the search. The timer for your records starts when you launch from this window.
Dungeon search is in Quick Actions. Tick one or more dungeons and start the search. Alone, you wait 15 seconds, then the game offers you to go alone. With two or more players on the same dungeon, the group leaves 15 seconds after the first one arrives, or right away if it is full. Each has 30 seconds to accept, and whoever refuses leaves the queue. Each pays their own entry.
Monsters follow the group's size. The "+15% / +30% / +50% loot" written by the search is only a display: everyone draws their loot at the rate of a solo player, and what you gain by playing in a group is time. .djmodu shows the table.
| Players | Monster health | Monster damage |
|---|---|---|
| 1 | ×1 | normal |
| 2 | ×1.6 | +15% |
| 3 | ×2.2 | +30% |
| 4 | ×2.8 | +45% |
Your companion does not count in the group's size. Groups are explained in Server.
Your records. For each dungeon, the game keeps your best time, your last time and your number of victories. You read them at the guardian, in "What awaits me in there?".
Pegasus dungeons
One card per dungeon, with the boss, the rule and a tip: Dungeons and Hardcore dungeons.
Pegasus dungeons are made by the server for the end of the game: eight rooms of eight monsters, the boss and seven guards in the last one. Their levels go from 200 to 300, and they never need a key. Each room won can drop a Legendary piece, and each victory over a boss adds fragments to its relic.
| Dungeon | Level | Boss |
|---|---|---|
| The Cursed Pasture | 200 | Corrupted Royal Boowolf |
| The Pegasus Maze | 225 | Impassable Legendary Crackler |
| The Cania Horde | 250 | Enraged Moowolf |
| The Peaks of Frigost | 275 | Obsidemon |
| The Count's Antechamber | 300 | Missiz Freezz |
| The Bay of Lanterns | 200 | Lord of the Bay |
Each victory over one of the first five dungeons gives a boss Trophy bound to your account. Three Trophies from three different dungeons pay the Stake of The Last Deal, a one-room challenge dungeon where three bosses follow one another.
Family dungeons
Four families of three dungeons await the Prestiges: Awakening, Paradox, Void and Zenith. Each dungeon has 8 rooms, from level 275 for Awakening to level 300 for the others, and its own list of equipment pieces. They open from Prestige I. Many bosses have a trick announced in the chat at the start of the fight.
The Abyss
The Abyss sets the difficulty of Pegasus dungeons and family dungeons, over 10 notches: the higher it is, the tougher the monsters and the more the boss pays, from 1.1 times its tokens at notch 1 to 2 times at notch 10. Type .abime to see the open notches, .abime 3 to take notch 3, .abime 0 to go back to the normal game. The notch is locked when you enter. All ten notches are open from Prestige I.
What if you lose a fight?
In Mono, losing a fight does not kill your character and takes nothing from what it carries. Heroic, the mode where a fallen character is lost, is closed for now.
Challenges
A challenge is an extra rule during a fight, shown on the left of the screen, one tile per challenge: hover over it to read the rule. You hold it until the victory, you earn extra Mana, XP and loot (12 to 40 Mana, +30% to +100%). If you break it, you lose nothing. The game draws them for you, from one to three per fight depending on your level, and they add up. Your companion and your summons never make you fail a challenge, but if your companion does almost all the work, no challenge is validated.
Each day, the daily contract gives three objectives, one in monsters, one in challenges, one in Mana. Each pays 26 to 70 Mana, and 75 Mana more if you finish all three. It is tracked in the Today tab of the Destiny Hub.
The 26 challengesTable
| Challenge | Rule | Mana | XP and loot |
|---|---|---|---|
| Statue | Do not move from your starting cell for the whole fight. | 22 | +50% |
| Zombie | Spend exactly 1 MP per turn. | 30 | +70% |
| Nomad | Spend all your MP every turn. | 20 | +40% |
| Bold | End every turn next to a living enemy. | 14 | +30% |
| Cautious | Never end a turn next to an enemy. | 18 | +40% |
| Out of Sight | Never end a turn in line of sight of a living enemy. | 34 | +80% |
| Clingy | End every turn next to an ally. | 20 | +40% |
| Misanthrope | Never end a turn next to another player. | 20 | +40% |
| Barbarian | Finish off every enemy with a weapon, never with a spell. | 24 | +60% |
| Elemental | Your first hit picks an element: your damage stays in it. | 26 | +60% |
| Clean Hands | No enemy dies from a direct hit by you. | 36 | +90% |
| Focus | Once you have attacked an enemy, finish it off before touching another. | 24 | +50% |
| Versatile | In the same turn, never cast the same action twice. | 22 | +50% |
| Frugal | Over the whole fight, cast each action only once. | 32 | +80% |
| Masterstroke | Land at least 2 critical hits. | 26 | +50% |
| Cruel | Finish off the enemies from the lowest to the highest level. | 12 | +30% |
| Orderly | Finish off the enemies from the highest to the lowest level. | 12 | +30% |
| Two for the Price of One | In one turn, finish off exactly two enemies or none. | 35 | +80% |
| Doume | All enemies die during the same combat turn. | 38 | +90% |
| Conqueror | When you finish off an enemy, end your turn on a cell it occupied. | 30 | +70% |
| Chrono | Finish off all enemies in 4 combat turns plus 2 per monster. | 28 | +60% |
| Untouchable | No player loses a single HP. | 40 | +100% |
| Survivor | No player falls. | 12 | +30% |
| Heartless | No player heals another. | 14 | +30% |
| Loner | Win without making an allied summon appear. | 16 | +30% |
| In the Crosshairs | End every turn in line of sight of a living enemy. Only drawn within the hour and a half after a vote. | 20 | +40% |
A 26th challenge exists: In the Crosshairs, for whoever voted less than 1 h 30 ago. In a boss fight, golden tiles can be added: each is the condition of an achievement, and pays no Mana, XP or loot.
Dreams
A Dream is a descent from room to room, alone. You beat the monsters, pick a door, start again: the deeper you go, the tougher the monsters and the more you earn. A loop has 26 depths and ends on a guardian, behind which a new loop begins. The Dream never ends by itself, it stops when you leave, and the Mana of the descent is paid to you at that moment.
There are 10 intensities in three families, Dream, Paradox and Nightmare, with an XP and loot bonus from +50% to +300%. At the start, only Dream I is open, and depth 10 of one intensity opens the next. Open "Endless Dreams" in the game menu or at the Ferryman of Zaaps and Dreams. If you close the game, CONTINUE gives you your Dream back.
Intensities, Favor, Fountain and shopTable
| Intensity | Starting dream points | Lives | XP and loot | Dream Scraps |
|---|---|---|---|---|
| Dream I | 10 | 1 | +50% | 25 per room won |
| Dream II | 10 | 1 | +75% | 50 per room |
| Dream III | 10 | 1 | +100% | 75 per room |
| Paradox I | 5 | 0 | +120% | 75 every 3 rooms |
| Paradox II | 5 | 0 | +140% | 100 every 3 rooms |
| Paradox III | 5 | 0 | +160% | 150 every 3 rooms |
| Paradox IV | 5 | 0 | +190% | 200 every 3 rooms |
| Nightmare I | 0 | 0 | +220% | 300 every 3 rooms |
| Nightmare II | 0 | 0 | +250% | 500 every 3 rooms |
| Nightmare III | 0 | 0 | +300% | 1,000 every 3 rooms |
The layout of a loop. Five tiers: Doziness (depths 1 to 3), Reverie (4 to 9), Deep Sleep (10 to 15), Lucid Dream (16 to 21) and Abyss (22 to 26). At each depth, 2 to 4 rooms are offered and you take one. Guardians wait for you at depths 7, 14, 20 and 26: 4 monsters counted as bosses, a chest and tokens.
Dream points, Favor and Fountain. Dream points are a small currency that only exists in the Dream. A Dream Favour offers three free options and you take one. A Dream Fountain (depths 4, 10, 16 and 25) sells bonuses for Dream points: +1 AP, +1 MP, +2 Range, damage, critical, a life, an Astral Storm. These bonuses only apply in the Dream.
The Dream shop. Right click your Dream Scraps in the bag: they stay with the character who earned them. They buy XP and loot potions (×2 for 30 minutes or 1 hour) and three relics, once per character. There is never a Mana Potion. You can buy at most 7 hours of XP and 7 hours of loot per week.
Code and training. An 8-letter-and-digit code always gives the same room layout: it is made for practicing or comparing with a friend. These Dreams earn nothing, and open no intensity.
Dopples and wanted notices
A wanted notice is a big named monster to kill for a bounty. There are 80, and you take one at a time, at the Keeper of the Dopples or at the Justiciar Clerk, in "Wanted notices": it is the same window. The sheet gives the monster's name, its level, its zone, its bounty and its protection. A notice is offered to you when your level is at most 10 below the target's. If you win, you earn tokens (for 10 notices per day), XP, the monster's loot and a notch of the Relic of the Justiciar.
The target waits for you in its zone, the one written on the sheet. There is no marker, no coordinates, no teleport: you go on foot and look for its group, the target and three guards of the map. It stands on a single map of the zone, drawn for your character: you find it in the same place if you reconnect. It only changes map if you stay 30 minutes out of the zone before coming back, and the Sanctuary counts as out of the zone. Other players do not see your group.
In the list, "alignment" and "justiciars" are categories: each target stands in an ordinary zone of the world, written on its sheet. The three Justiciars are Dumsh, in the Bottomless Swamps, Poison Amy, in the Dark Jungle, and Scampihorse, in the Abyss Rooms. The Justiciar Clerk stands in the Sanctuary's Justiciar corner, where four steles light up when you have closed 20, 45, 70 and 80 notices.
The three tokens and the Relic of the JusticiarTable
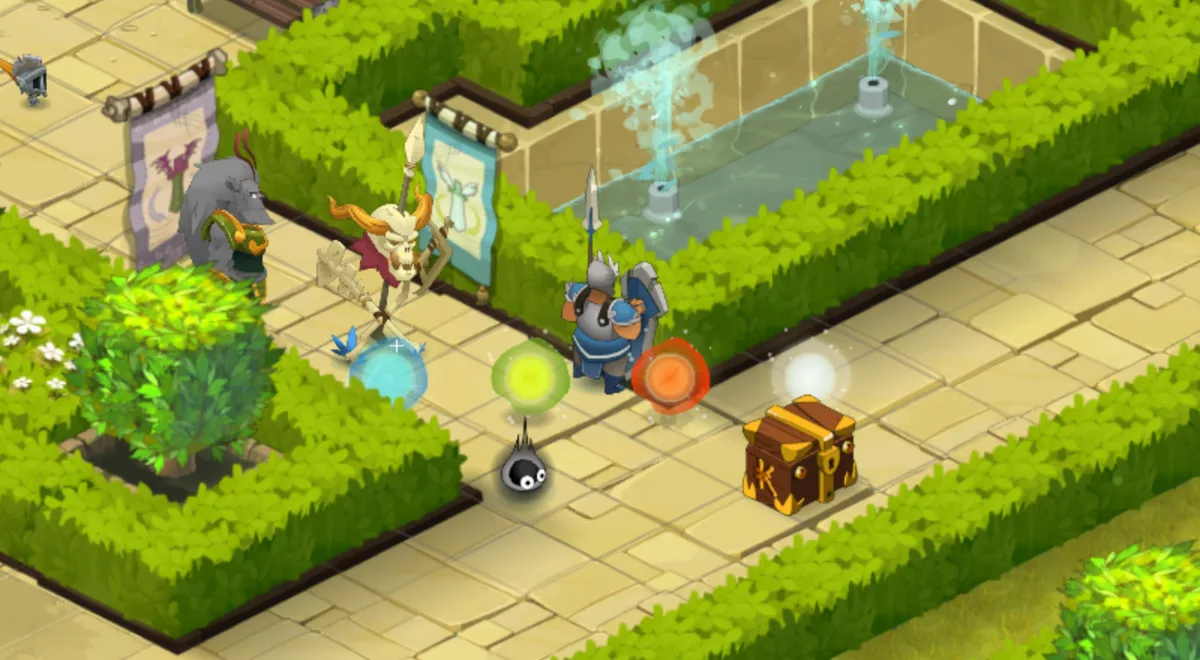
Three tokens pay for notices: Alitons for the targets of the alignment Militias, Avitons for almost all the others, Ice Kamas for those of Frigost, on top of Avitons. The higher the target, the more it pays: from 120 to 2,040 Avitons. They are real bag items, that stay with the character who earned them. A right click on the token opens its shop (titles, Relic Shards).
The Relic of the Justiciar is bought once with 120 dungeon tokens, then it grows with each different notice you close.
| Notices closed | Bonus |
|---|---|
| 20, 40, 60 and 80 | +1 Prospecting each time |
| 20 | +1 MP |
| 45 | +1 Range |
| 70 | +1 AP |
| 80 | +1 more Range |
At 80 notices, the Relic gives +4 Prospecting, +1 AP, +2 Range and +1 MP. The "Bounty Hunter" (20 notices) and "Justiciar" (80 notices) titles go with it.
The Dopples
There is one Dopple per class, to fight once a day each. The Keeper of the Dopples sends you to the Hall of the Dopples, where the day's Dopples wait: click one of them, then chain them. Everything comes back at midnight, and the Dopple takes the grade closest to your level. A victory pays XP, Mana, loot and Doplons: 40 at level 1, 400 at level 200. Doplons buy scrolls. .dopeuls lists the ones you have left.
This week's end game
When you have finished the main road, you have enough to fill every day and every week, and none of it is mandatory. Every day: your 3 Keyring entries in the best-paying dungeons, .dopeuls, a Roulette spin on each wheel, the daily contract, up to 10 paid Kolossium victories. Every week, on Monday everything changes: .rusher for the week's dungeon, .spirale to climb your tower, and .cavaliers for the Horsemen.
The Spiral of Eons
The Spiral is an endless tower at the foot of the Water Clock Tower, in Frigost. Each victory opens the next, tougher floor. The climb restarts from zero every Monday at 00:00 UTC, and the Top 50 counts the floors (.spirale top).
Floors, tiers and Spiral pay
- Floor 1 is at level 200 with 3 monsters, then one more monster every 6 floors. Every 25 floors, a tier awaits you: eight monsters led by a Time Hunter.
- You keep your best tier to redo it at will:
.spirale palier 50..spirale resetmakes you start again at floor 1. - It pays the XP, Mana and resources of an ordinary fight, tokens, Relic Shards and elemental relic badges. No Legendary piece, no Dofus and no La Donne card drops there.
The Rusher Event
Each week, one of the first five Pegasus dungeons is featured, one per week in order. Its boss gives its relic fragments doubled, and can drop the week's Rusher relic: 10% chance per victory, guaranteed on the tenth without it. .rusher says which dungeon is featured, .rusher top shows the Top 50 of the fastest. Nothing can be bought: these relics drop from a boss and nowhere else.
The Horsemen and the Anomalies
The Horsemen (War, Misery, Servitude and Corruption) fight together in a single level 300 room, each with its own rule. The gate opens at Prestige V. An Anomaly is a boss from another era that sometimes slips into a boss room.
Imprints, Loops and appearance chances
- Horsemen. Each Horseman killed gives an Imprint, 20 per week at most. 200 Imprints buy the Relic of the Horsemen (+1 AP). A Legend drops with a 0.5% chance per Horseman killed: the four together give the Rider of the Apocalypse title.
.cavaliersshows your Imprints. - Anomalies. They appear in 5% of the boss rooms of a Pegasus dungeon and 2% of those of an original dungeon of level 190 or more, from level 200, and for certain after 40 rooms without seeing one. An anomaly alternates a turn invulnerable in melee and a turn invulnerable at range, and says so at each switch.
- Each anomaly defeated gives 25 Time Loops, and 1,000 Loops buy the Relic of Bébémoth.
.anomaliesopens the bestiary.
The Kolossium
The training Kolossium is the game's real Kolossium queue, played alone against a Reflection: a double of your class, at your level. It opens at level 50: click the Kolossium entry on the banner, or type .koli. You start at 1,000 points, with a league every 100 points, from Bronze III to Legend. A victory pays Kolizetons, never XP, Mana or loot.
Kolossium points, leagues and shop
- A victory earns 20 points (5 more from the third in a row), a defeat removes 15, never below 1,000. The Reflection hits harder as your league rises. You have 30 seconds to accept the fight found.
- A victory pays 8 Kolizetons, plus 2 per block of three leagues, plus 10 for the first of the day, up to 10 paid victories per day.
- The shop (right click the Kolizetons) sells a boss's token pay and Relic Shards.
Arenas and souls
A soul stone keeps the soul of a monster group you beat, and you can replay that group in an arena whenever you want. It all starts from a single icon.
Open "Arenas and souls" in Quick Actions. The portal icon opens the game's zaap window: the five arenas, the Soul Road and hunting grounds. The trip is free, outside a fight.
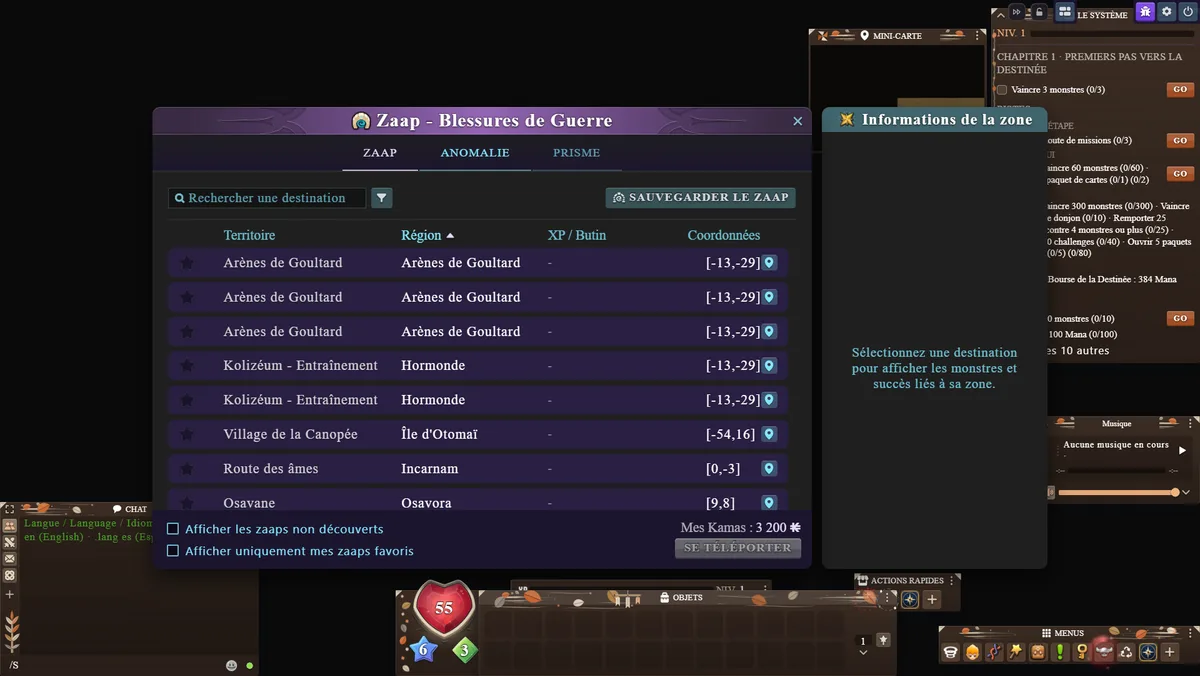
The "Arenas and souls" window: the arenas, the Soul Road and hunting places. Take an empty stone. The Guardian of the Arena, in each arena, and the Soul Seller, on the Soul Road, sell five stones for Mana, from the Small (80 Mana) to the Gigantic (590 Mana). Equip it in the "Combat consumable" slot.
Cast Soul Capture just before the last hit. The spell costs 4 AP, has a 3-turn cooldown and places the Soul Seeker state for 2 turns. At victory, if you still have the state and the group fits in the stone, it fills up: 8 souls at most, one per monster.
Use the full stone, outside a fight. You arrive in a Kolossium arena where the group awaits you. The fight opens by itself, then you return to where you were, win or lose. The stone is consumed when the fight opens.
Pick up the XP and loot. The fight pays those of a normal fight. It pays no Mana, tokens or relic fragments.
Capture works in almost all won fights: open world, dungeons, Pegasus and family dungeons, Abyss. It is refused on all Dimension maps, including Enutrosor, Srambad, Xelorium, Ecaflipus, the Lost Dimension and those of the Horsemen, as well as in a soul arena, on a wanted notice, a Dopple, a Dream or the Gigalodon. In a Dimension, the game writes that souls cannot be taken and the stone stays empty.
The five soul stonesTable
| Stone | Level to wear it | Souls up to level | Price in Mana |
|---|---|---|---|
| Small | 20 | 50 | 80 |
| Medium | 50 | 100 | 170 |
| Large | 100 | 150 | 320 |
| Huge | 150 | 190 | 470 |
| Gigantic | 190 | 1,000 | 590 |
The stone captures for certain and each capture consumes it. If the group's highest level does not fit in the stone, it stays intact.
Watching a fight
The eye at the top of the screen opens the list of all fights in progress on the server. You can watch one, without touching it.
Open the list. Click the eye in the top row, or "Fights in progress" in Quick Actions. The "Fight list" window gives one line per fight: the number of players, the level, the duration, then the attackers and the defenders.
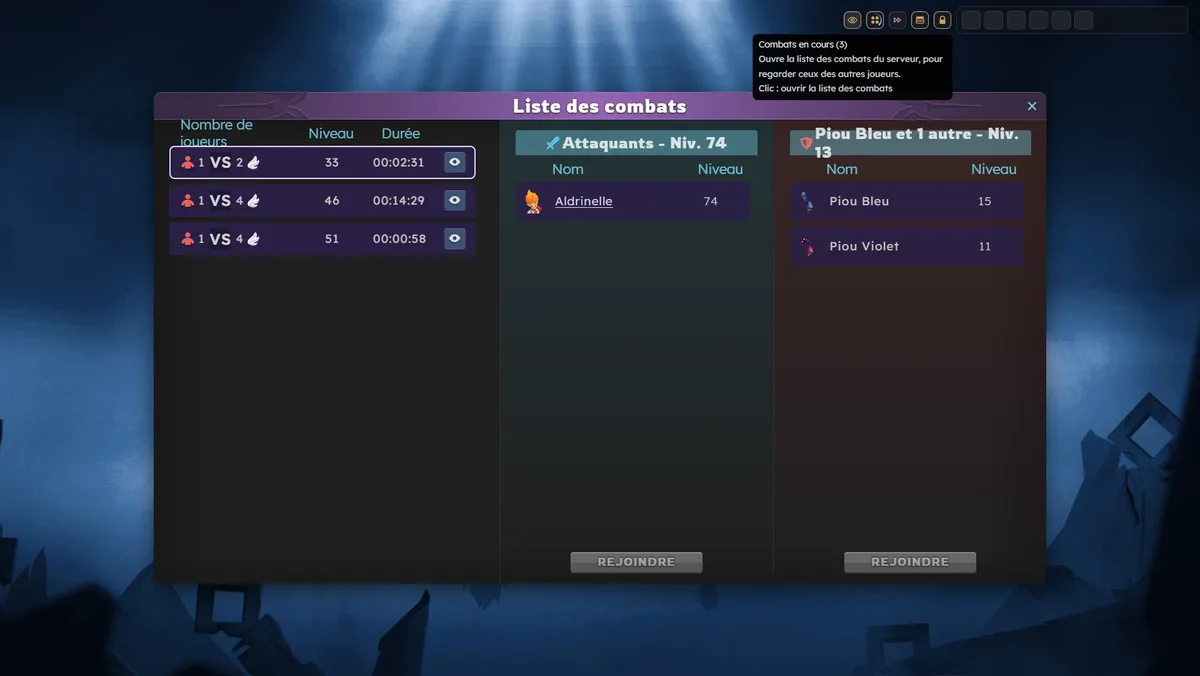
The list of fights in progress, opened by the eye. Click the eye on the line, or double-click it. You see the fight live: turns, spells, movements, health.
Leave with "Leave the fight as a spectator". You return to the map you left. The end sheet shows no loot or XP of the fighters.
A spectator does not play: they do not move, cast nothing and type no command. Only fights that have already started are listed. Dungeons, the Abyss and Hard fights can be watched. The Kolossium, soul arenas, Dreams and Dopples are neither listed nor observable. A fight accepts 30 spectators, and the fight's "Forbid spectators" option closes the door to newcomers.
Passives in combat
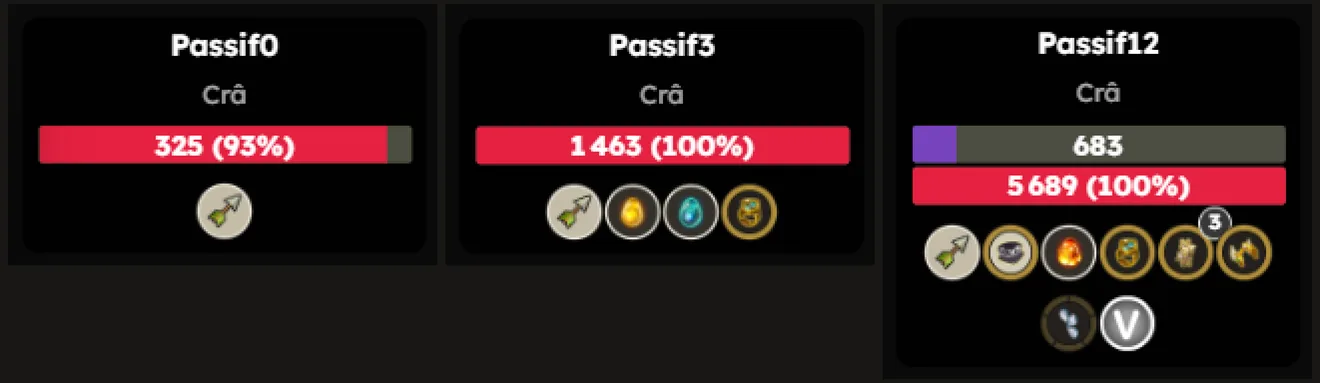
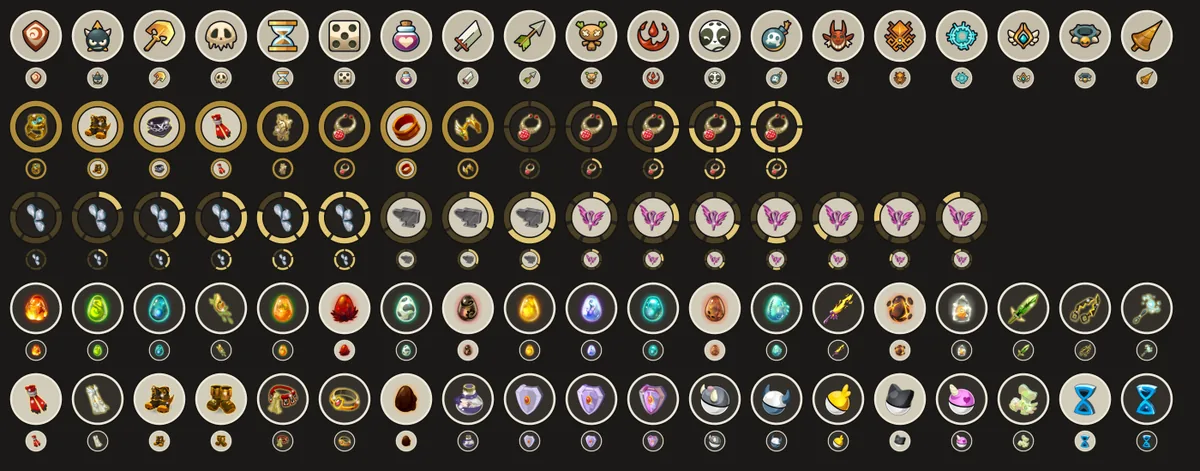
Your passives act by themselves: your class's, those of your items, those of your Prestige Insignia. In combat, each is a fight state with its own round icon, the same size as the official states. The chat stays quiet: there is no passives line at the start of the fight any more.
What the icons show
- Your class emblem is visible to all players.
- Item and Insignia medallions are only visible to the one who wears them. An item gives its image. A Prestige Insignia gives its image in a brass ring thicker than the official states.
- Six medallions at most, plus the class emblem. Beyond that, a numeral says how many passives are folded: on the capture, V for five.
- A counter fills the ring by one notch per value. Frenzy goes from 0 to 5.
- A used passive is grayed out and struck through until the next turn, like Momentum and Quick Mind.
- A number of turns is shown in the game's gray badge, like on Aegis.
Reading the exact sentence
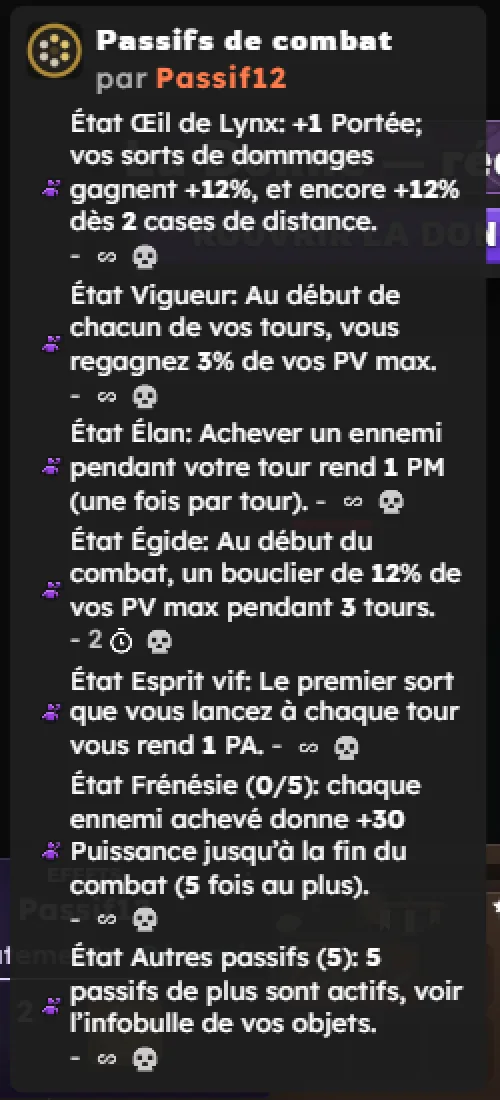
Icons carry no text. To read what each passive does, open the Bewitchments window: the "Combat passives" tile gives one line per passive, with the exact sentence and the current number, for example Frenzy 0/5, or Aegis with its remaining turns. Passives folded in the numeral are counted there.
Combat settings
A few commands set the pace of your fights. None gives you power: they save time or make bosses simpler. .pass passes your turns by itself, .pret makes you ready by default, .noanim speeds up animations, .invo sets your companion. A turn lasts 45 seconds against monsters. By default, boss locks are removed: you hit the boss from the first turn. The padlock at the top of the screen brings back the official mechanics.
Passing turns, fast fight, boss locks, turn lengthOne by one
| Setting | Effect |
|---|---|
.pass | Passes your turns automatically in combat. Type again to stop it. Set outside a fight. |
.pret | You are ready by default when a fight opens, without being able to place yourself. Set outside a fight. |
.noanim | Fast fight: animations run twice as fast. .noanim on and .noanim off set the state without toggling it. An icon at the top of the screen does the same, and the command works in the middle of a fight. In a group, the fight is only fast if all the players asked for it. |
.invo | Your companion plays alone, or you play his turns. |
.delock | Boss mechanics are a setting, off by default. .delock on brings them back; they stay forced in the hardcore dungeons of bands 4 and 5, the Prestige trials and the Nightmare. Locks are those puzzles that lift an invulnerability (details). |
| Turn length | 45 seconds per turn against monsters (dungeons, Dreams, bosses), 60 seconds for placement. The Kolossium and Tax Collectors keep the official length. |
| Autopilot | The official autopilot, Ctrl + click on the map, requires VIP+ or the season's VIP Destiny Pass. |
| Farm mode | See Equipment. |